'Experimenting with the software is necessary but experimenting with your camera makes more sense'
I have been into backpacking and photography for 4 years now. I've trekked on terrains with difficulty level ranging form the easiest to the toughest. Most of us (even me before doing a trek) confuse the term trekking with mountaineering/rock-climbing/hiking. Let me first familiarize you with the term "trekking". Basically a trek trail, or route, is prepared or marked on a map keeping in mind the size of the valley, steepness of the mountains and the season ( i.e. water availability, climate). The map can be digital (e.g. google maps) or conventional. Trekking actually involves many activities including climbing, hiking and even bouldering . A typical easy trek requires a walk along the stream, which requires jumping on rocks in the stream (in this case small ones) , then requires some climbing to reach the ridge and then some ridge walking (which is generally on the shoulders of a mountain). The difficulty of a trek is measured by the distance of the trek, or the duration of the trek, or the availability of water.
Now that I've explained you
about the terrain one can imagine the pain in carrying the photography
equipment and, most importantly, managing to capture the moments or scenes
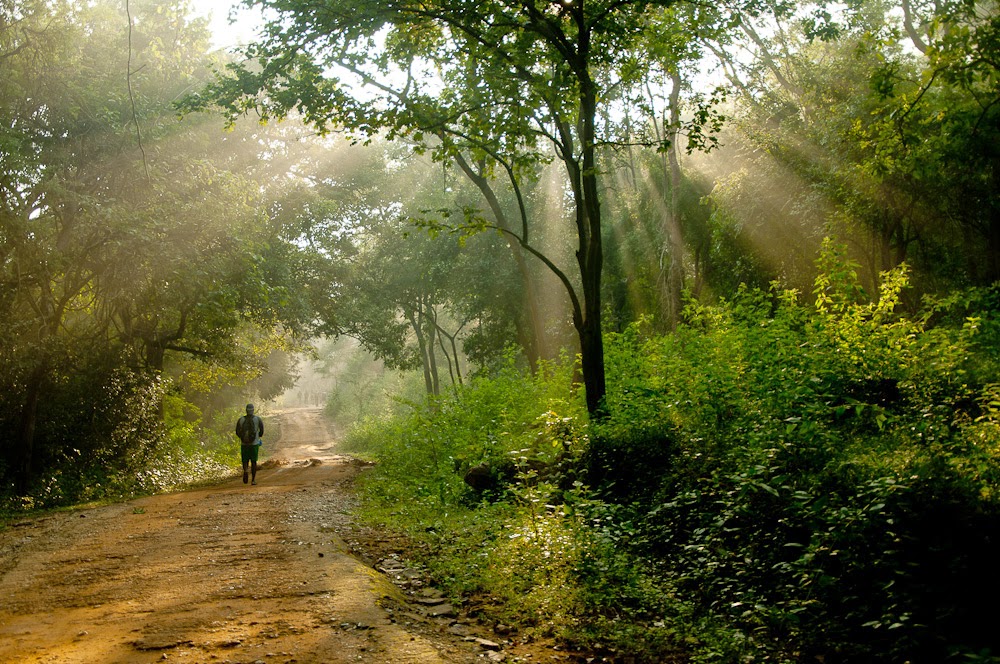
without delaying the group. When you are on an exploratory trek where
speed is required and terrain is unknown, carrying the photography equipment
becomes much more challenging. A photography enthusiast cannot avoid taking
photos during the trek because the lighting there is so true and magical. When
we walk on the ridges, or reach a peak of the mountain the landscapes, views
are so exclusive and more than breath-taking. In this blog I would like
to share a few tips / suggestions on the equipment choice , Dos and
Donts in photography during the trek, and also discuss about
photo-summarizing a trek in minimum number of photographs.
The following is a list of
equipment that generally affects the weight and size of your kit. I've given
below a few suggestions based on my experience and also on others' feedback.
Lens:
Generally apart from the
camera body, it is the lens which most contributes to the heaviness of
the kit. As I said earlier, magical lighting in case of portraits, and
breath- taking views in-case of landscapes, is inevitable on a trek. So
are you going to carry a wide angle lens , 24 mm for landscape and a portrait
lens in addition ? My answer would be NO
. It inevitably makes the kit heavy with a body. Not to mention
the personal stuff and food items we will carry on a long duration
trek. I generally prefer to carry a 18-105mm and 50mm prime lens along with my
body (nikon d7100). Canon users can opt for a 18-135 lens. Both the above-mentioned
lenses are good for general purpose as well.
Carry-case :
It's always better to keep the carry case as compact as possible. If you are to carry two lenses , a case like in the picture below should do a great help. However , there are much more compact bags available in the market if you are opting for a single lens. As I said earlier, choosing your kit and the case wisely will make your life easy on the trek. And, also choose a bag / case that has handy & useful compartments because a lot of unused space in your case is useless. Please check for the bags/cases which hasve a water cover. These days it has become a mandatory thing on the camera carry case in any price range.

Things to carry in your case
:
These are some mandatory
contents in your camera case which is known to all . I'm just re-iterating the
importance of the equipment.
1) Lens cleaning kit
2) Silicon packets ( to
absorb moisture in case you are trekking in winter)
3) Zip lock and plastic
covers
4) Spare memory cards
5) Battery charger ( although
there is no point in carrying a charger deep in to the woods , you may come
across some villages during the trek where the camera can be charged if
required)
Do's :
Following are some healthy
practices that can be followed when clicking on the treks.
Cover Landscapes:


Any trek you do there will be a peak-climb in the plan for sure. Whenever you get on top , apart from group photos make sure you cover the landscapes. Don't just go for regular frames you saw on any website.Use your creativity , frame interesting and exclusive shots. Look for the colors in the sky. Watch out for patterns formed by the surrounding peaks.
Do visualize the scene in monochrome because more-often you get to see interesting shadows and patterns. It is important to get inspired by famous landscape photographs , at the same time we must try to establish our own style of composition along which we become matured and recognized as a photographer.
Cover Landscapes:
Any trek you do there will be a peak-climb in the plan for sure. Whenever you get on top , apart from group photos make sure you cover the landscapes. Don't just go for regular frames you saw on any website.Use your creativity , frame interesting and exclusive shots. Look for the colors in the sky. Watch out for patterns formed by the surrounding peaks.
Do visualize the scene in monochrome because more-often you get to see interesting shadows and patterns. It is important to get inspired by famous landscape photographs , at the same time we must try to establish our own style of composition along which we become matured and recognized as a photographer.
Be attentive to the
moments:
In any kind of
photography, stealing the moments is the secret of winning the gamble. So pay
attention to the group. A group is always composed of mischievous, quiet ,
observant , enthusiastic people. Try to bring out people's character in your
photograph. Below are a few examples of such photographs. Start studying your subjects right there.
The man in the below picture is Peter Van geit. A Belgian , is the founder of chennai trekking club. Knowing him very well , I can assure that one cannot describe in words his thirst of adventure and curiosity on conquering peaks.

The man in the below picture is Peter Van geit. A Belgian , is the founder of chennai trekking club. Knowing him very well , I can assure that one cannot describe in words his thirst of adventure and curiosity on conquering peaks.
Experiment:
During a trek experimenting
may not be a good idea as it is time consuming. But, you can experiment during
naps , lunch breaks, and especially on camp sites and during campfire.
.jpg)
Never underestimate the magic a campfire can add to the photo. This photo was taken at a slow shutter during a campfire. To note, I used a 50mm lens.

Having said that ,you also
require a compatible low light body or lens. That is the reason why I always
carry a 50mm prime along with my 18-105. It's my personal choice of equipment. It is upto you what equipment you want to carry. But make sure it makes sense to the type of trek you are in. You need to have
confidence on your equipment, which in-turn demands developing a good
understanding on your equipment.
Portraits :
Portraits :
You may feel that I am discussing light, again ! But come on, photography is gamble of light.


Try taking some candid moments of the group/individuals. Capture the action when people swim or jump in the pools.

Modes:
First things first, set the
camera in manual mode ('M'). Set your comfortable ISO and WB and play around
with the shutter/F value. Always ,always, always watch the meter for
'every single' click. I personally try to keep the ISO for the day as 320, WB
in to sunny /Cloudy, and play with the shutter/F value . Same way find your comfort zone and play with in that.
Photo-summarize:
Try to summarize the trek in
15 -20 photographs. For example, you are on a tough trek and you have to cross
a narrow gorge, do not miss that photo in the album because that one photo will
suggest to the viewer that the trek was tough. This way you can increase your
story, describing the group’s capability, and also make your album look short
and sweet. The below picture shows my friend Ram taking pictures of us standing
over a gorge. I just clicked him with a little bit of surrounding details, just
enough to suggest that he is taking a risk to photograph us.

Donts
Following are certain
practices to be avoided during and after clicking on treks.
Extensive Post-processing :
Post-processing to an extent
of minor color correction, cropping, or exposure adjustments can be understood
and accepted. But, please do not try to over-process the image . For example ,
saturating the colors too much or applying irrelevant filters through any of
the software. I personally feel that post-processing should be done with the
sole motive of reproducing what you saw on the shot. Anything beyond that does
not make you a photographer but a Photoshop artist.
Huge watermarks:
It has become a fashion
these days to add a funny logo to the photo suggesting the name or the
studio of the photographer. Again it is acceptable for the photo to bare your
name on it, but please make sure it does not occupy the frame and spoil the
story.
Clicking extensively:
If you really want to
improve your photography skills please stop filling your memory card with
pictures, going back home viewing on the computer, and selecting a few from
them. This bad habit of yours and can be helpful only if you are a
beginner but certainly not beyond that. If you are taking up photography
seriously you should visualize the frame and then shoot. You should also always
know what your output is going to be. It's natural people do this,
especially with the evolution of digital photography, but there are lot
of ways to help yourself out. One way I successfully overcame this
tendency of mine is I assumed that I am
a film photographer and I have very little space to just 'click'. It takes time
for you to set to that mode but once you are used to it you are only going to
gain better picture quality.
Remember, the above points
are stitched based on my own experience . I've given you only a few points and
suggestions, or rather work-arounds, to situations every photographer faces.
Photography on treks is never easy. Every trek I learn something new in terms
of framing, lighting etc. You will also learn as long as you keep trying
different things. Experimenting with the software is necessary but experimenting with your camera makes more sense.
Finally, I request my readers
to go through this article, provide your feedback, and suggest me if there are any
points I can add.
Please have a look at my work on : http://mkfotoblogs.blogspot.in/
Thanks so much for spending your time learning from my experience. All the best with your trek photography!
Thanks so much for spending your time learning from my experience. All the best with your trek photography!
No comments:
Post a Comment